
Merry Christmas! Did a special someone come down your chimney last night for a visit? Whether he visited you or not, I’ve got a special treat to make your day as sweet as can be. Santa’s favorite sugar cookies are everything you’ve dreamt about and more. Straight from your childhood and a staple at the North Pole, Santa’s favorite sugar cookies are light, tender, sweet, and just the treat you’re looking for to enjoy your Christmas festivities. Simple as can be, these cookies are perfect to whip up for your family and friends, or a great way for some entertainment with a cookie decorating station!

Merry Christmas and enjoy your day! xoxo
Cookie Ingredients:
- 2 3/4 cups all-purpose flour
- 1 teaspoon baking powder
- 1 cup sugar
- 1 cup (2 sticks) salted butter, room temperature
- 1 tsp vanilla extract
- 1 large egg
Royal Icing Ingredients:
- 1 egg white
- ½ tsp vanilla extract
- 2-3 cups of powdered sugar
- Food coloring of your choice (optional)
- ¼ tsp water if needed + additional ¼ tsp water depending on how thick you want your icing
Preheat the oven to 350 degrees F.
Line a large baking sheet with parchment paper. Whisk the flour and baking powder in a medium bowl to blend. Using an electric mixer, beat the sugar, butter, and vanilla in a large bowl to blend. Beat in the egg and mix to fully combine. Add all of the flour mixture in 2-3 batches, and beat just until blended.
Split the dough in half, and form them into round disks, about 2 inches thick. Tightly wrap in plastic wrap and chill in the fridge for at least one hour.
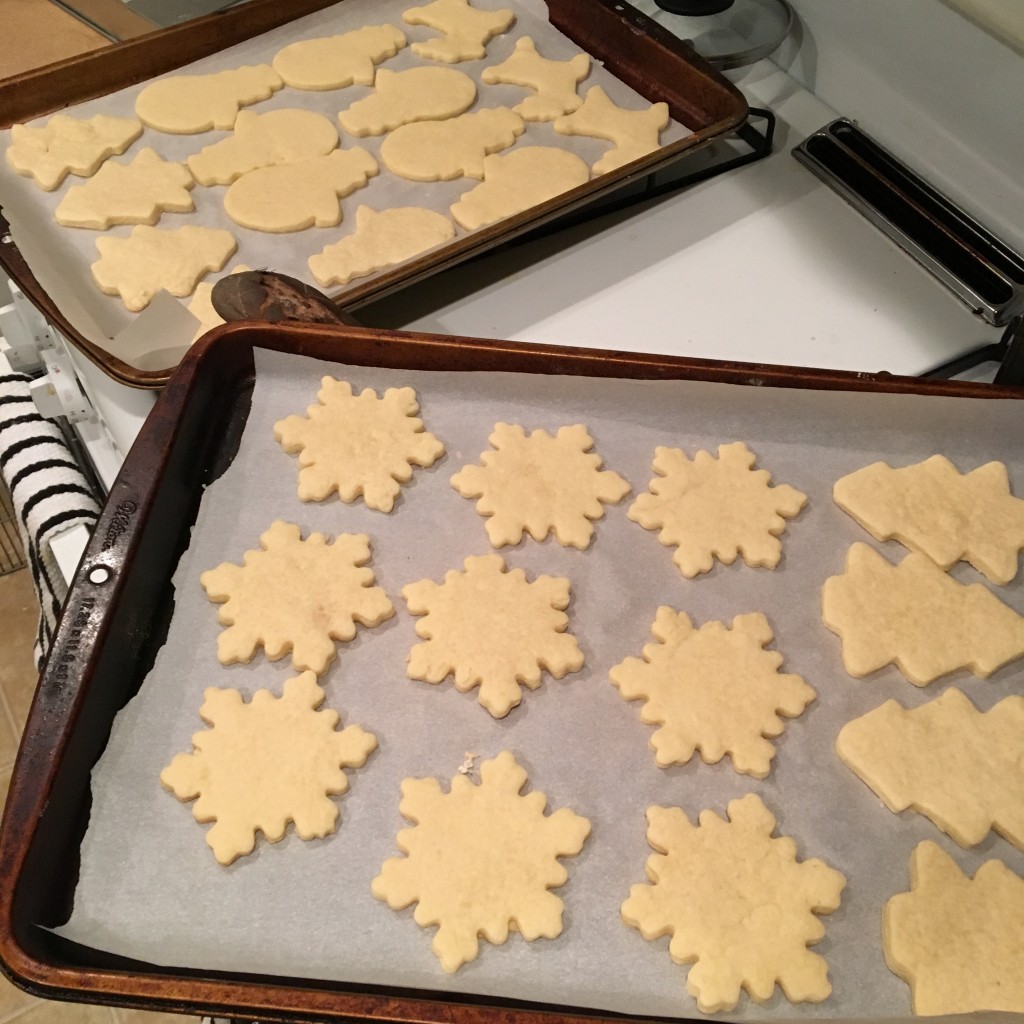
Working with one disk at a time, roll out the dough to about ¼- ½ inch thick, on a well-floured surface and cut out with your favorite festive cookie cutters.
Bake at 350 degrees for 6 minutes. Let cool on pan for 5 minutes, then transfer to wire rack.
To make the icing, mix egg white, and vanilla, then beat in the powdered sugar in the bowl of an electric mixer fitted with a whisk attachment, or by hand with a whisk. NOTE: This icing recipe is a guideline, and I tend to add more powdered sugar/water depending on what I want to do with the icing. If you want it thicker, add more sugar. If you want it a little thinner and runnier, add more water ¼ tsp at a time.
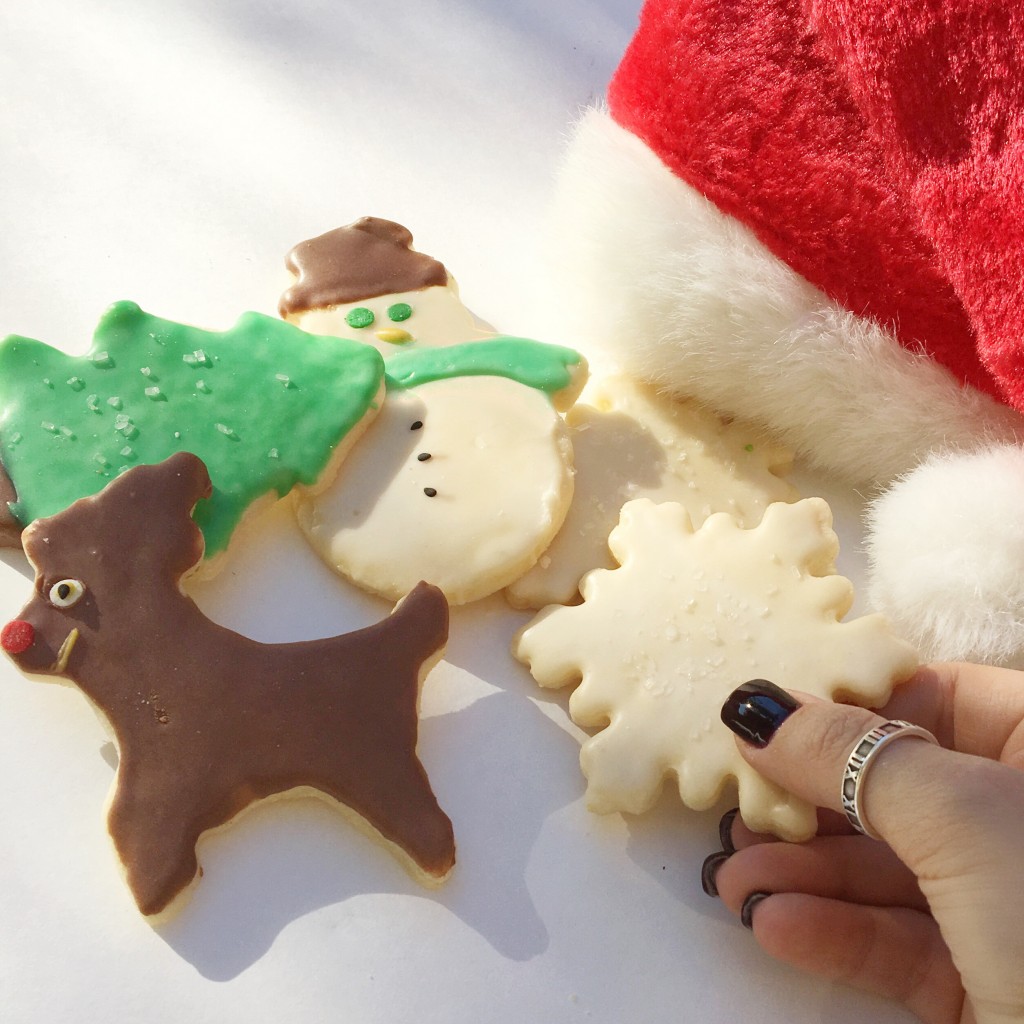
Make sure the cookies are FULLY COOLED before you ice them. If you ice them when they are warm, the icing will just run off. You can have fun decorating the cookies and spend time with details, or if you want something simple and beautiful, just pick one color icing, and using a knife, frost all of the cookies in the same color for a cool, monochromatic look. To have a sleek iced look without spread marks, make the icing a touch thinner. This will ensure that when it dries, you don’t see the marks from where you spread it onto the cookie and it will look like one even coating.
Use your favorite food coloring to dye the icing, or you can use natural products as well. I used unsweetened coco powder to make brown frosting for reindeer, and used turmeric (it really has almost no flavor) to make orange/yellow icing for the snowmen noses. You can also use fruit or beets to make red dye.
Let the cookies set up and dry for about an hour so icing doesn’t get everywhere, and enjoy Santa’s favorite sugar cookies!